


Norfolk Pine Houseplant Care Guide for 2026
The Norfolk Pine houseplant has become a beloved indoor tree for plant enthusiasts seeking to bring a touch of evergreen elegance into their homes. Despite its common name, this stunning plant isn't actually a true pine but rather an ancient conifer native to Norfolk Island in the South Pacific. With its symmetrical branches and soft, delicate needles, this living centerpiece offers year-round beauty and can thrive indoors for decades when given proper care. Whether you're drawn to its holiday charm or simply appreciate its architectural presence, understanding the specific needs of this tropical tree will help you cultivate a healthy, vibrant specimen.
Understanding Your Norfolk Pine Houseplant
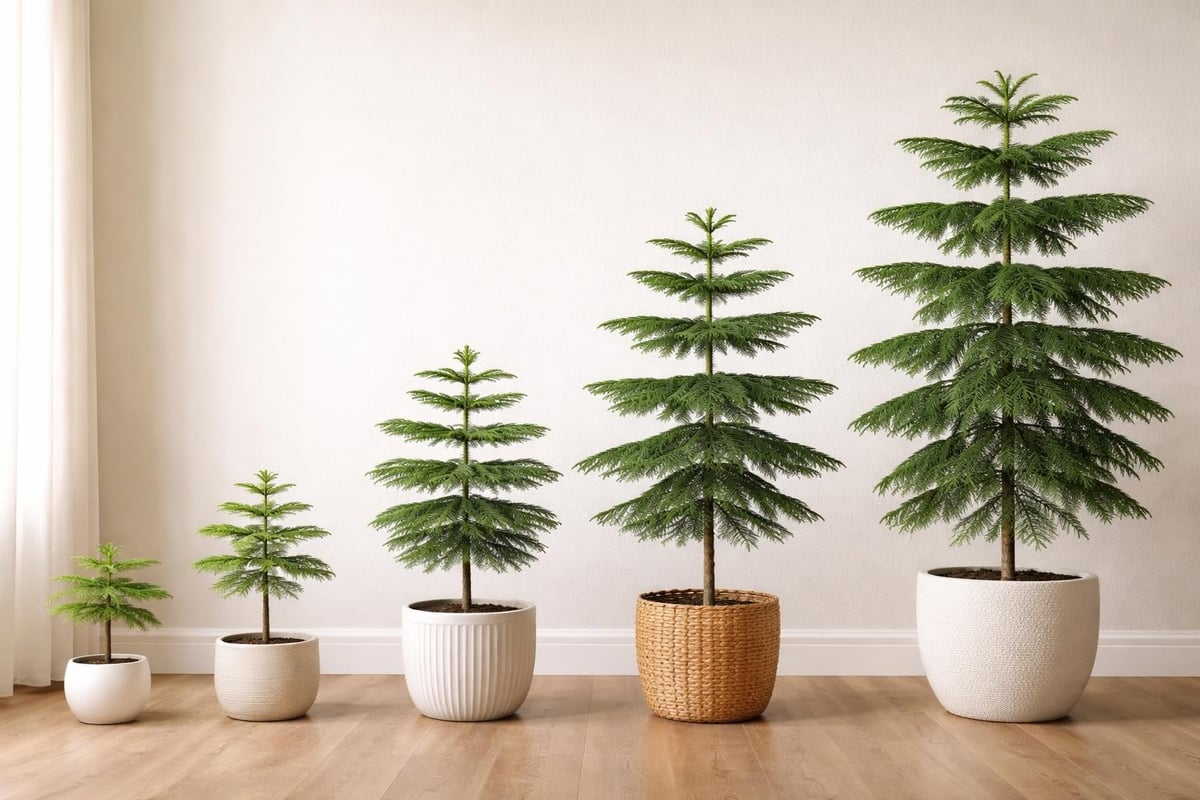
The Norfolk Island Pine (Araucaria heterophylla) stands apart from typical houseplants due to its unique origins and growth patterns. In its natural habitat, this majestic tree can reach heights of 200 feet, but indoor specimens typically grow to a more manageable 3-8 feet over several years.
Growth Characteristics and Expectations
Unlike many indoor plants that adapt quickly to various conditions, the Norfolk Pine maintains specific requirements rooted in its tropical heritage. The tree produces new growth in distinct tiers, creating its signature pyramidal shape. Each year, healthy plants develop a new whorl of branches, making it easy to estimate the age of mature specimens.
Key growth features include:
- Slow to moderate growth rate of 3-6 inches annually
- Symmetrical branching patterns that emerge in whorls
- Soft, bright green needles on younger growth
- Darker, more rigid needles on mature branches
- Potential indoor height of 6-8 feet with proper care
The plant's juvenile foliage differs significantly from its mature form. Young plants display softer, more flexible needles that feel almost feathery to the touch. As the Norfolk Pine matures, lower branches develop stiffer, more pointed needles while maintaining the soft appearance on new growth.
Essential Light Requirements
Light management represents the most critical factor in Norfolk Pine care. These trees evolved in bright, tropical environments and struggle without adequate illumination. Gardening Know How emphasizes that insufficient light causes more problems than almost any other care issue.
Position your Norfolk Pine houseplant near a bright window where it receives several hours of direct morning or filtered afternoon light. South-facing or east-facing windows provide ideal exposure in most homes. The tree tolerates some direct sun, particularly during cooler months, but intense afternoon rays through west-facing windows may scorch the delicate needles.
Rotating for Balanced Growth
Professional growers recommend rotating your plant one-quarter turn every week to ensure even light distribution. Without rotation, the tree will lean dramatically toward the light source, compromising its symmetrical appearance. Mark the pot with a small piece of tape to track your rotation schedule consistently.
Light troubleshooting guide:
| Symptom | Cause | Solution |
|---|---|---|
| Branches drooping downward | Insufficient light | Move closer to bright window |
| Needles turning brown, crispy | Too much direct sun | Filter harsh afternoon light |
| Stretching between tiers | Low light conditions | Increase light exposure gradually |
| Yellowing lower branches | Natural aging or darkness | Trim dead growth, improve lighting |
Watering Strategy and Soil Moisture
The Norfolk Pine houseplant requires consistent moisture without waterlogging. Unlike drought-tolerant succulents, this tropical tree prefers soil that remains slightly moist but never soggy. Water thoroughly when the top inch of soil feels dry to the touch, allowing excess water to drain completely from the pot.
During active growth periods in spring and summer, you may need to water every 7-10 days. Winter watering frequency typically decreases to every 10-14 days as growth slows. Always check soil moisture before watering rather than following a strict schedule, as factors like humidity, temperature, and pot size influence water consumption rates.
Drainage and Pot Selection
Choose containers with multiple drainage holes to prevent water accumulation at the root zone. Norfolk Pines develop root rot quickly in saturated conditions, manifesting first as browning lower branches that gradually spread upward. If you notice persistent wilting despite moist soil, root rot may have already established.
The ideal potting mix combines:
- 50% high-quality potting soil
- 25% peat moss or coco coir
- 25% perlite or coarse sand
This blend provides moisture retention while ensuring adequate aeration around the roots. When repotting becomes necessary, select a container only one size larger than the current pot to avoid overpotting, which can lead to water retention issues.
Temperature and Humidity Needs
Temperature stability plays a vital role in Norfolk Pine health. These trees thrive in cool to moderate temperatures ranging from 60-70°F, with nighttime temperatures slightly cooler. Avoid placing your plant near heating vents, radiators, or drafty windows that create temperature fluctuations.
High humidity replicates the Norfolk Pine's native environment. Aim for relative humidity levels between 50-70%, which exceeds typical household conditions in most climates. Low humidity causes needle browning and drop, particularly affecting the delicate new growth at branch tips.
Humidity enhancement methods:
- Run a cool-mist humidifier near the plant
- Place the pot on a pebble tray filled with water
- Group plants together to create a microclimate
- Mist foliage lightly in morning hours (controversial among experts)
- Avoid placing near air conditioners or heaters
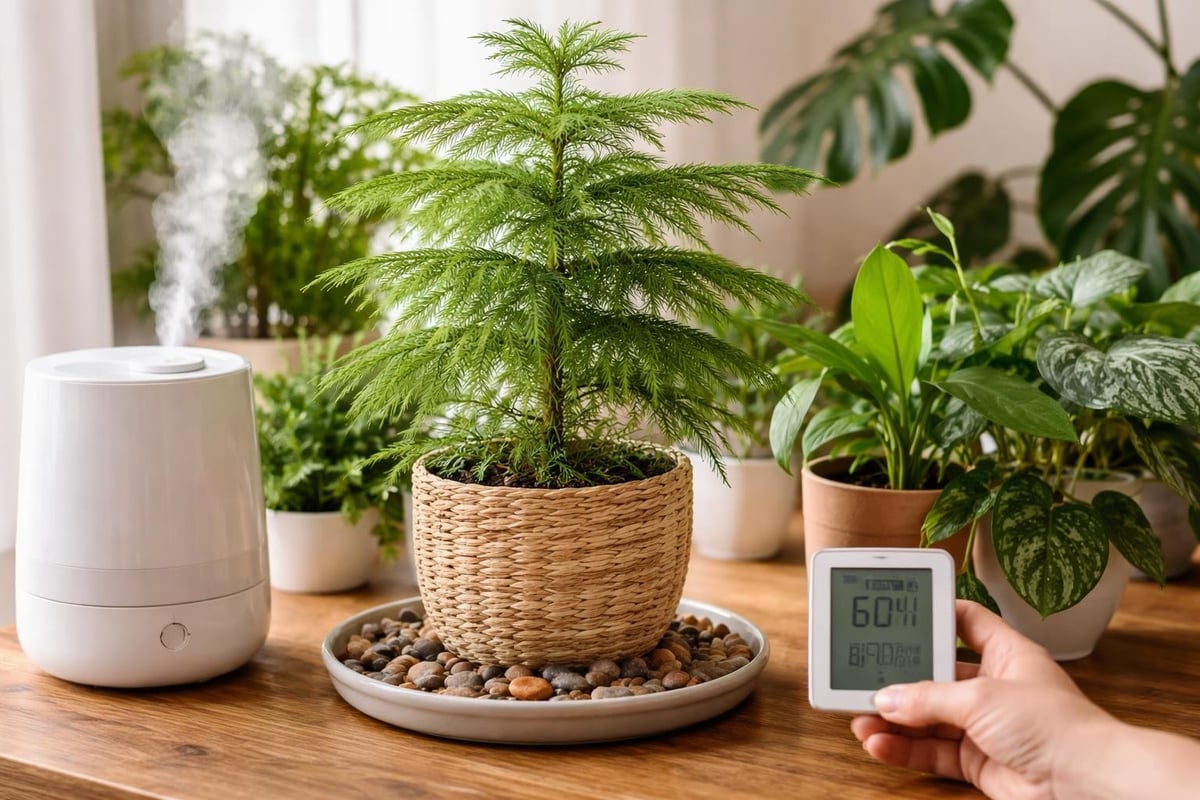
Winter heating systems particularly challenge Norfolk Pine houseplant care. Purdue University recommends maintaining cooler temperatures during winter months, as excessive heat combined with low humidity accelerates needle drop and weakens the plant's overall vigor.
Fertilization Schedule
Norfolk Pines benefit from regular feeding during their active growing season from April through September. Use a balanced, water-soluble fertilizer formulated for houseplants, diluted to half the recommended strength. Apply every 2-3 weeks during spring and summer, then reduce to monthly feeding in fall and eliminate fertilization entirely during winter dormancy.
Excessive fertilization causes more harm than underfeeding. Salt buildup from over-fertilization appears as white crusty deposits on the soil surface and can burn root systems. If you notice this accumulation, flush the soil thoroughly with plain water several times to remove excess salts.
Nutrient Deficiency Signs
| Nutrient | Deficiency Symptom | Correction Method |
|---|---|---|
| Nitrogen | Yellowing older needles, pale new growth | Increase feeding frequency |
| Iron | Yellow needles with green veins | Apply chelated iron supplement |
| Magnesium | Browning needle tips, yellowing between veins | Add Epsom salt solution monthly |
The easy care plants collection at Divine Roots includes several alternatives if Norfolk Pine care proves too demanding for your current schedule or environment.
Common Problems and Solutions
Even with attentive care, Norfolk Pine houseplants occasionally develop issues. Early detection and prompt intervention prevent minor problems from becoming severe threats to plant health.
Needle Drop and Browning
The most frequent complaint among Norfolk Pine owners involves needle browning and shedding. This symptom results from multiple potential causes, making diagnosis essential before treatment. Natural aging causes some lower branch needle loss, but widespread browning indicates environmental stress.
Primary causes of needle problems:
- Insufficient humidity (most common)
- Inconsistent watering patterns
- Temperature extremes or drafts
- Low light conditions
- Sudden environmental changes
Recovery from extensive needle loss takes considerable time. Focus on correcting the underlying environmental issue rather than attempting to reverse existing damage. New growth will gradually replace lost foliage once optimal conditions resume.
Pest Management
Spider mites, scale insects, and mealybugs occasionally infest Norfolk Pines, particularly when plants experience stress from suboptimal care. Spider mites thrive in dry conditions, creating another reason to maintain adequate humidity levels.
Inspect your plant regularly for early signs of infestation:
- Fine webbing on needles (spider mites)
- Small brown bumps on branches (scale)
- White cottony masses in branch crevices (mealybugs)
- Sticky residue on foliage or nearby surfaces
Treat minor infestations with insecticidal soap or neem oil applications, repeating every 7-10 days until pests disappear completely. Severe infestations may require systemic treatment or, in worst cases, plant disposal to prevent spread to other specimens.
Propagation Challenges
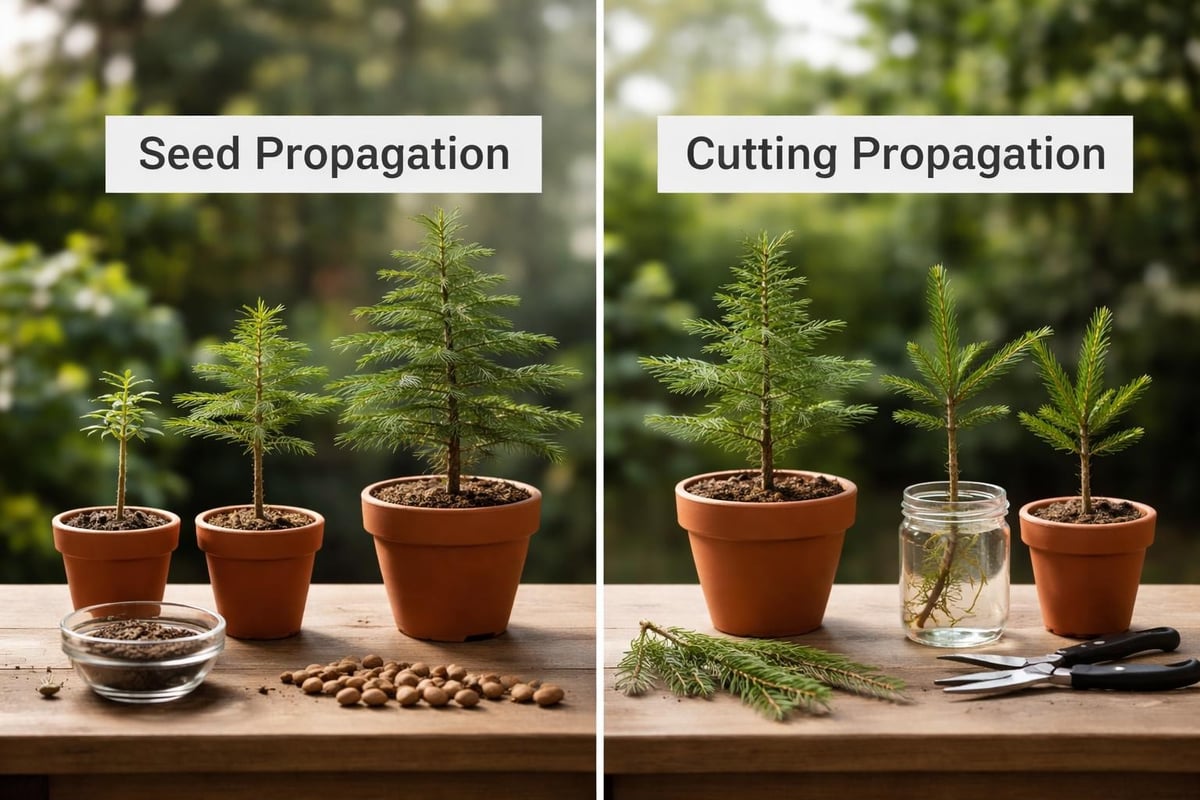
Unlike many houseplants that propagate readily from cuttings, Norfolk Pine propagation proves difficult for home growers. Commercial production relies primarily on seed, which requires specific conditions and considerable patience.
Tip cuttings occasionally root but rarely develop the characteristic symmetrical form of seed-grown plants. Cuttings maintain their horizontal growth orientation rather than developing the upright leader necessary for proper Norfolk Pine architecture. This limitation makes seed propagation the preferred method despite its challenges.
Growing from Seed
Fresh Norfolk Pine seeds germinate more reliably than stored seeds, which lose viability within months. Sow seeds in well-draining seed-starting mix, barely covering them with soil. Maintain consistent moisture and temperatures between 70-75°F. Germination occurs sporadically over 2-6 months, requiring patience and consistent care throughout the process.
Seasonal Care Adjustments
Norfolk Pine care requirements shift throughout the year, reflecting the plant's natural growth cycles. Understanding these seasonal changes helps you anticipate and meet evolving needs before stress symptoms appear.
Spring (March-May):
- Increase watering frequency as growth accelerates
- Resume regular fertilization schedule
- Provide maximum light exposure
- Monitor for pest activity as temperatures warm
Summer (June-August):
- Maintain consistent moisture levels
- Continue fertilization every 2-3 weeks
- Protect from intense afternoon sun
- Ensure adequate humidity during hot weather
Fall (September-November):
- Gradually reduce watering frequency
- Decrease fertilization to monthly applications
- Prepare for lower indoor humidity levels
- Check for drafts as heating systems activate
Winter (December-February):
- Water sparingly, allowing slight drying between applications
- Eliminate fertilization completely
- Provide coolest acceptable temperatures
- Maximize light exposure during short days
- Monitor humidity levels vigilantly
Country Living suggests treating Norfolk Pines as living Christmas trees during winter holidays, but caution against placement too close to heat sources or excessive decoration weight that damages delicate branches.
Long-Term Maintenance
Mature Norfolk Pine houseplants require periodic maintenance beyond daily care routines. Repotting every 2-4 years refreshes soil nutrients and provides additional root space as the tree grows. Wait until roots emerge from drainage holes before repotting, as these trees prefer slightly cramped conditions.
The best repotting time falls in early spring before active growth begins. Select a container only 2 inches larger in diameter than the current pot. Larger jumps in pot size encourage excessive soil moisture retention that damages roots.
Pruning Considerations
Unlike many houseplants that benefit from regular pruning, Norfolk Pines rarely require trimming. The symmetrical growth pattern develops naturally without intervention. However, damaged or dead branches should be removed promptly using clean, sharp pruning shears.
Never remove the central leader or top growth point. This growing tip controls the tree's vertical development and cannot regenerate if damaged. Loss of the central leader permanently stunts upward growth, though side branches will continue developing.
Selecting Healthy Specimens
When adding a Norfolk Pine houseplant to your collection, careful selection ensures you start with a vigorous, healthy plant. Examine potential purchases thoroughly before bringing them home, as stressed plants struggle to recover even with optimal subsequent care.
Quality indicators:
- Vibrant green coloration throughout
- Symmetrical branch arrangement
- No visible pest activity or webbing
- Firm, upright central leader
- Moist but not waterlogged soil
- Multiple tiers of healthy growth
- No brown or yellowing needles
Avoid plants displayed in dark corners of retail spaces or those showing signs of environmental stress. The adjustment period from greenhouse to home already challenges Norfolk Pines, and starting with a compromised specimen increases failure rates significantly.
Shopping from specialty growers who ship directly from controlled environments often yields better results than purchasing from general retailers. Divine Roots ships thriving plants directly from their greenhouse, ensuring minimal stress during the transition to your home environment.
Companion Planting Ideas
While Norfolk Pines make stunning standalone specimens, they also pair beautifully with other houseplants that share similar care requirements. Creating grouped displays generates beneficial microclimate conditions while enhancing visual interest.
Compatible companion plants:
- Ferns (Boston, maidenhair, bird's nest)
- Peace lilies for contrasting foliage
- Prayer plants for tropical flair
- Ivy varieties for trailing interest
- Pet-friendly plants if you have animals
Ensure companion plants tolerate similar light levels, humidity requirements, and temperature ranges. Avoid pairing Norfolk Pines with cacti or other drought-loving specimens that prefer opposite conditions.
Addressing Common Misconceptions
Several persistent myths about Norfolk Pine care circulate among plant enthusiasts. Clarifying these misconceptions helps establish realistic expectations and prevents disappointment.
Myth versus reality:
| Myth | Reality |
|---|---|
| Norfolk Pines adapt easily to low light | They require bright, indirect light to thrive |
| These trees tolerate dry air well | High humidity is essential for health |
| Water only when soil completely dries | Maintain consistent slight moisture |
| They're true pine trees | They're tropical conifers, not pines |
| Perfect for beginners | They require intermediate care skills |
The Norfolk Pine houseplant demands more attention than truly low-maintenance options but rewards dedicated care with years of elegant beauty. Understanding its specific needs before purchase prevents frustration and increases success rates dramatically. For those seeking genuinely easy care plants, consider exploring alternative options better suited to variable home conditions.
Space Planning and Placement
Norfolk Pines eventually require substantial floor space as they mature. Plan for at least 3-4 feet of clearance around mature specimens to accommodate their natural spread. Young plants suit tabletops or plant stands, but relocation becomes necessary as vertical growth continues.
Consider ceiling height when selecting placement for long-term growth. Standard 8-foot ceilings accommodate Norfolk Pines for several years, though eventual height management through controlled pot sizing may become necessary. Homes with vaulted ceilings or open floor plans provide ideal settings for these architectural plants to reach their full indoor potential.
Avoid high-traffic areas where branches might sustain damage from routine household activity. The delicate needle structure breaks easily, and while individual damage doesn't threaten plant health, it compromises the tree's aesthetic appeal.
Growing a thriving Norfolk Pine houseplant requires dedication to specific environmental conditions, but the reward of nurturing this elegant living tree makes the effort worthwhile. By maintaining bright light, consistent moisture, cool temperatures, and high humidity, you'll enjoy years of evergreen beauty that brings natural sophistication to your indoor space. Whether you're expanding your existing collection or starting your indoor gardening journey, Divine Roots offers carefully selected plants shipped directly from their greenhouse to ensure your new specimens arrive healthy and ready to thrive in your home.
Related Guides
- Winter houseplant care
- Indoor humidity guide
- Best grow lights
- How to save a dying plant
- Watering indoor plants
- Large indoor plant pots
About the author
Written and reviewed by Robert, Founder of Divine Roots — he grows, propagates and ships the plants we sell, and the care advice here reflects what actually works in our own greenhouse.
Frequently Asked Questions
How do you care for a Norfolk Island pine indoors?
Give it bright indirect light with some direct sun, keep the soil lightly moist but never soggy, and maintain humidity above 50 percent. Norfolk pines are tropical trees, not true conifers, so they need warmth above 60°F and never tolerate frost or cold drafts.
Why are my Norfolk pine branches turning brown and dropping?
Brown, dropping lower branches usually mean dry air, inconsistent watering, or too little light. Once a branch browns it will not regreen, and Norfolk pines do not regrow branches from bare stems, so fix humidity and watering early to protect the shape.
How much light does a Norfolk pine need?
At least four to six hours of bright light daily, ideally near an east or west window with some gentle direct sun. In dim rooms the branches stretch, spacing widens, and the tree leans toward the light, so rotate the pot a quarter turn weekly.
Should I mist my Norfolk pine?
Misting helps only briefly. For lasting effect use a humidifier, a pebble tray, or group it with other plants, aiming for 50 percent humidity or more. Dry winter air near heating vents is the single most common cause of browning needles indoors.
Can I keep a Norfolk pine as a Christmas tree every year?
Yes, and it is one of the best living alternatives. Use only lightweight ornaments, since the branches are flexible and easily deformed, and skip hot lights and flocking spray. Return it to its bright, humid spot immediately after the holidays.
Is the Norfolk Island pine toxic to pets?
It is listed as mildly toxic to cats and dogs, and chewing the needles can cause vomiting and stomach upset. The sap may also irritate skin. It is not among the dangerous plants, but keep it out of reach of dedicated chewers.
Share